Building Documentation
FBGEMM_GPU provides extensive comments in its source files, which provide the most authoritative and up-to-date documentation available for the package.
Building the API Documentation
Note: The most up-to-date documentation build instructions are embedded in a set of scripts bundled in the FBGEMM_GPU repo under setup_env.bash.
The general steps for building the FBGEMM_GPU documentation are as follows:
Set up an isolated build environment.
Build FBGEMM_GPU (CPU variant).
Set up the documentation toolchain.
Run documentation build scripts.
Set Up Build Environment
Follow the instructions for setting up the Conda environment at Set Up an Isolated Build Environment.
Build FBGEMM_GPU
A build pass of FBGEMM_GPU is required for the documentation to be built correctly. Follow the instructions in Install the Build Tools, followed by CPU-Only Build, to build FBGEMM_GPU (CPU variant).
Set Up Documentation Toolchain
# !! Run inside the Conda environment !!

# From the /fbgemm_gpu/ directory
cd docs

# Install Sphinx and other docs tools
pip install -r requirements.txt

# Install Doxygen and Make
conda install -c conda-forge -y doxygen make
Build the Documentation
# Generate the C++ documentation
make doxygen

# Generate the Python documentation and assemble together with the C++ documentation
make html
After the build completes, view the generated documentation:
sphinx-serve -b build
Deployment Preview
As a PyTorch project, a preview of the FBGEMM_GPU documentation will be automatically built and deployed by Netlify when pull requests are made. When the build completes, the deployment preview can be found at:
https://deploy-preview-<PR NUMBER>>--pytorch-fbgemm-docs.netlify.app/
General Documentation Guidelines
When new public API methods are added, they should be accompanied by sufficient documentation. Here are some guidelines for documenting FBGEMM_GPU code:
Code by itself is not documentation! Put yourself in the shoes of new developers who has to understand what your code does, and make their lives easier.
Documentation should be added for any and all public API methods.
Don’t leave docstring-writing as a separate task.
Write docstrings together with the code.
At a very minimum, add:
A description of the method.
A description for each argument that can be passed into the method.
A description of the method’s return value.
Add usage examples, links to other methods, and method invocation limitations.
Adding Documentation to Python Code
Documentation for Python is provided through docstrings and generated using Sphinx. Please reference the Google-style Python docstrings guide for docstring formatting examples.
Please add Python docstrings to the .py files under the name of the
method:
def example_function():
    """
    This class is an example of how you can write docstrings.
    You can add multiple lines of those descriptions. Make sure to include
    useful information about your method.

    Args:
        arg1 (int): This is the first arg that you can pass with this function.

    Returns:
        This function returns X.

    Raises:
        AttributeError: This function raises an error.

    Example:
        This is how you can use this function

        >>> print("Code blocks are supported")

    Note:
       You can find more information
    """
Adding docstrings does not automatically publish them to the package documentation. To publish new docstrings:
Add the module method to its corresponding
.rstfile.To preview locally, run
make html.Verify the changes by building the docs locally or submitting a PR for a Netlify preview.
Adding Documentation to C++ Code
Documentation for C++ is provided through Javadoc-style comments and generated using Sphinx + Doxygen + Breathe.
Documentation is kept in header files with the .h extension as well as in
.cpp, cu, and cuh files. In these files, everything between
#ifndef DOXYGEN_THIS_WILL_BE_SKIPPED and #endif will be hidden from the
HTML output. At the moment, undocumented functions are hidden in these tags.
When you add descriptionss to a function, make sure that the #ifndef and
#endif are configured correctly.
All functions are grouped by a specific group for better organization.
Make sure you add @defgroup to the code comments to define the group, and
@ingroup in each docstring to associate the target method with the group.
Follow these instructions to document, generate, and publish a new C++ description:
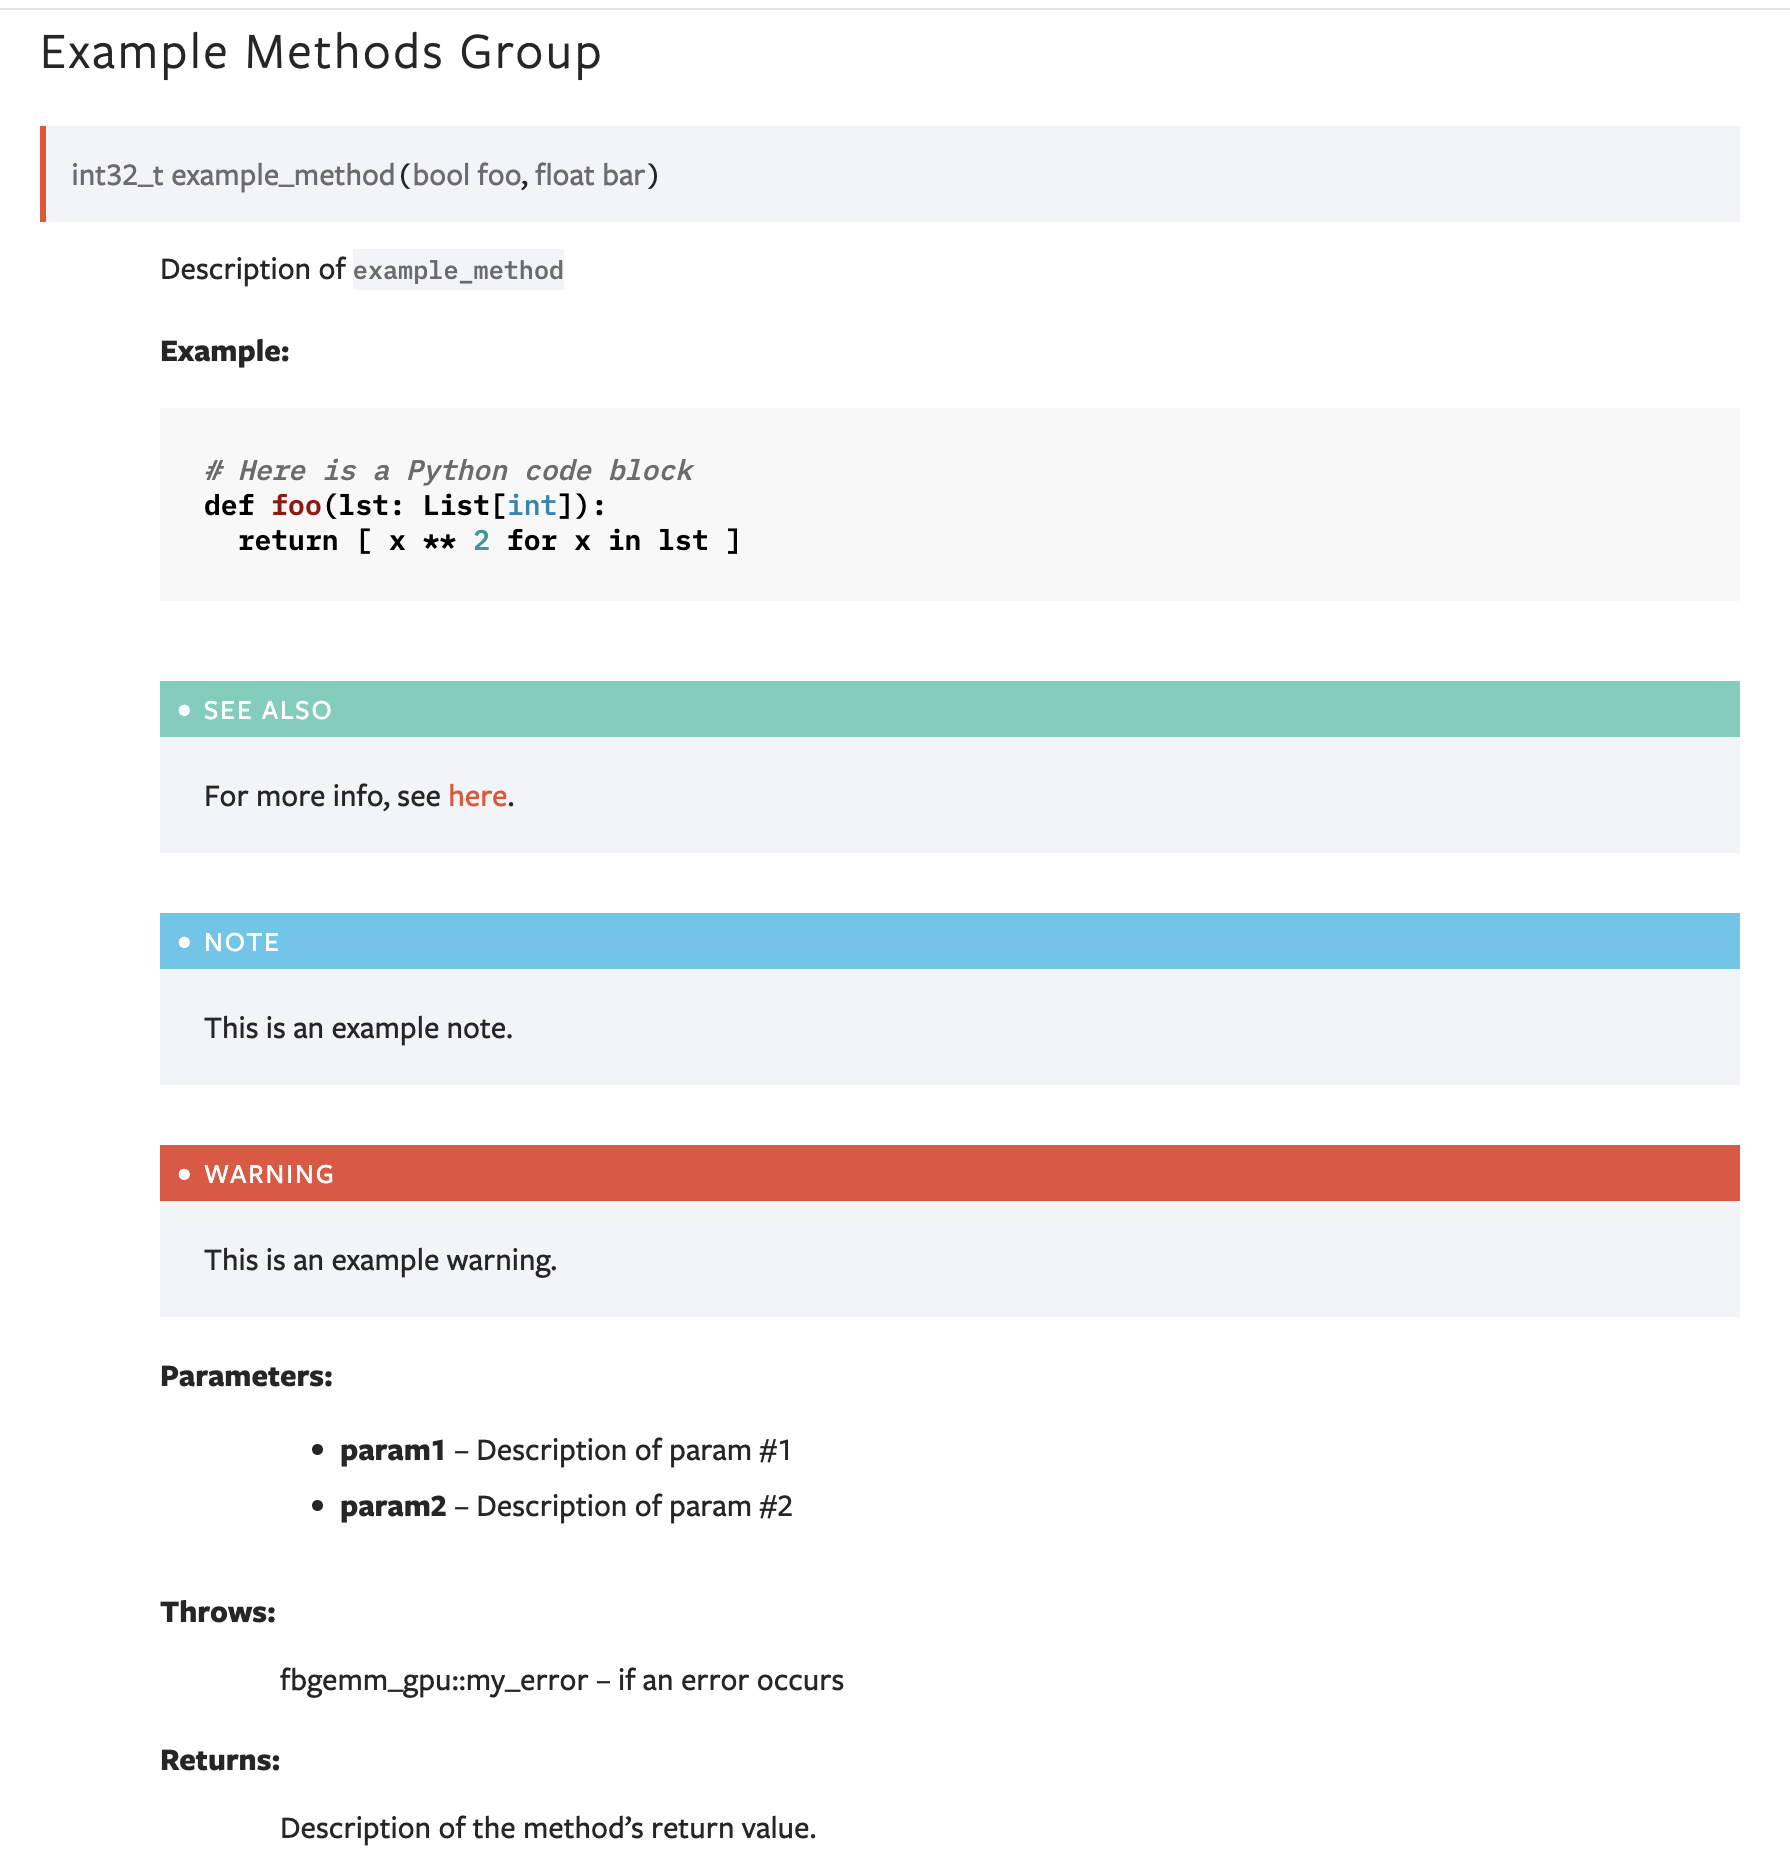
Add a description to the source header file. At a very minimum, add a description verbatim, parameters by using the
@paramtag, and return value by using the @return tag. You can other tags as needed. Here is an example of how it can look:/// @defgroup example-method-group Example Method Group /// This is a description of the example method group. /// @ingroup example-method-group /// Description of `example_method` /// /// **Example:** /// ```python /// # Here is a Python code block /// def foo(lst: List[int]): /// return [ x ** 2 for x in lst ] /// ``` /// /// @param param1 Description of param #1 /// @param param2 Description of param #2 /// /// @return Description of the method's return value. /// /// @throw fbgemm_gpu::my_error if an error occurs /// /// @note This is an example note. /// @warning This is an example warning. /// @see For more info, see <a href="https://www.doxygen.nl/manual/commands.html#cmdlink">here</a>. int32_t example_method(bool foo, float bar);
Add a
doxygengroupdirective to the corresponding.rstfile. If an.rstfile for the corresponding header file does not exist, create a new one by the same name as the header file. If an.rstfile already exists, make sure thedoxygengroupis defined in that file. Using the above example:Example Methods Group --------------------- .. doxygengroup:: example-method-group :content-only:
This example generates the following HTML output:
Make sure the
.rstfile is included in to thetoctreeinindex.rst(fbgemm-gpu.docs.toc.cpp).The C++ source header file needs to be in one of the directories listed in the
INPUTparameter inDoxygen.ini. If it’s in a directory not listed, be sure to append the directory path to the parameter.Verify the changes by building the docs locally or submitting a PR for a Netlify preview.
Sphinx Documentation Pointers
Adding References to Other Sections
To reference other sections in the documentation, an anchor must first be created above the target section:
.. _fbgemm-gpu.docs.example.reference:

Example Section Header
----------------------

NOTES:

#.  The reference anchor must start with an underscore, i.e. ``_``.

#.  There must be an empty line between the anchor and its target.
The anchor can then be referenced elsewhere in the docs:
Referencing the section :ref:`fbgemm-gpu.docs.example.reference` from
another page in the docs.

Referencing the section with
:ref:`custom text <fbgemm-gpu.docs.example.reference>` from another page
in the docs.

Note that the prefix underscore is not needed when referencing the anchor.
